Since I’m a cheapo cost-conscious blogger, I don’t process my images using Adobe Photoshop but rely instead on software that’s already available on my computer, specifically Microsoft Photos, Paint 3D and Powerpoint.
The functionality available is basic, but since I don’t do anything fancy, it gets the job done. Just simple photo enhancements, image cropping, resolution adjustments and montage creation.
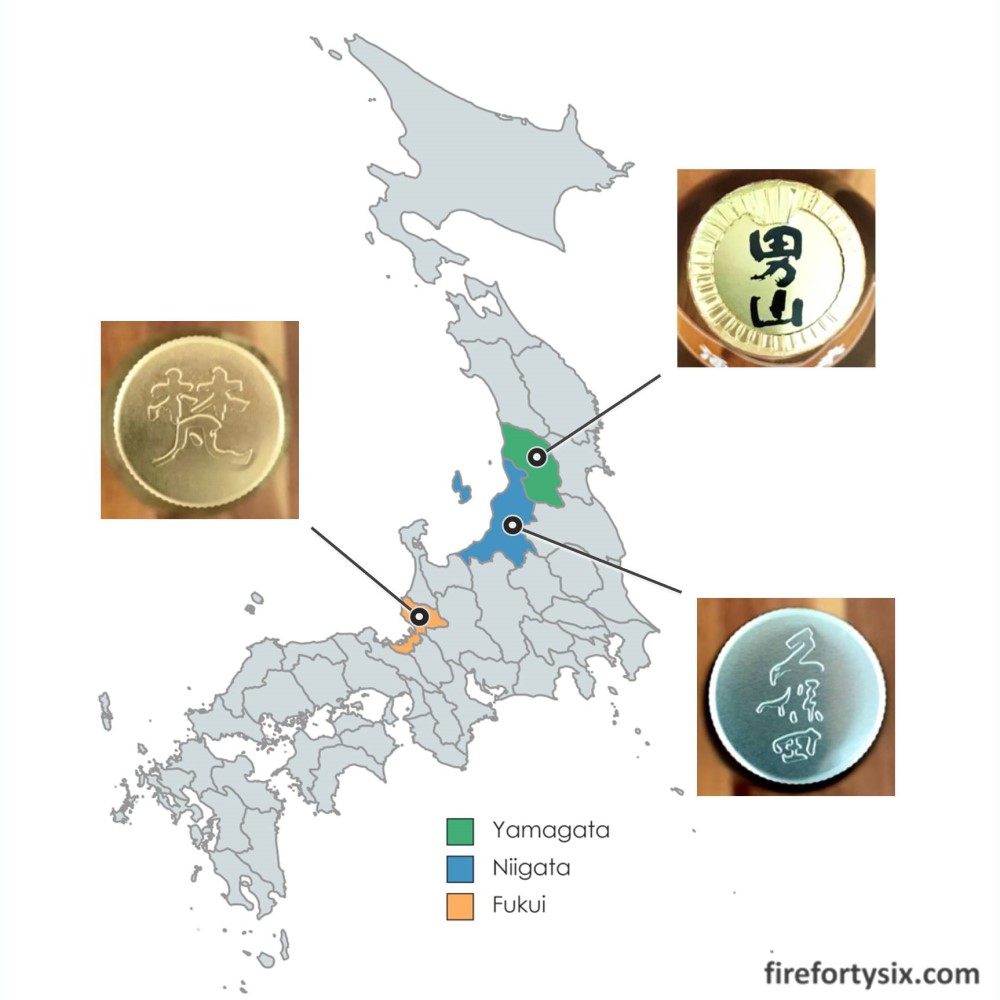
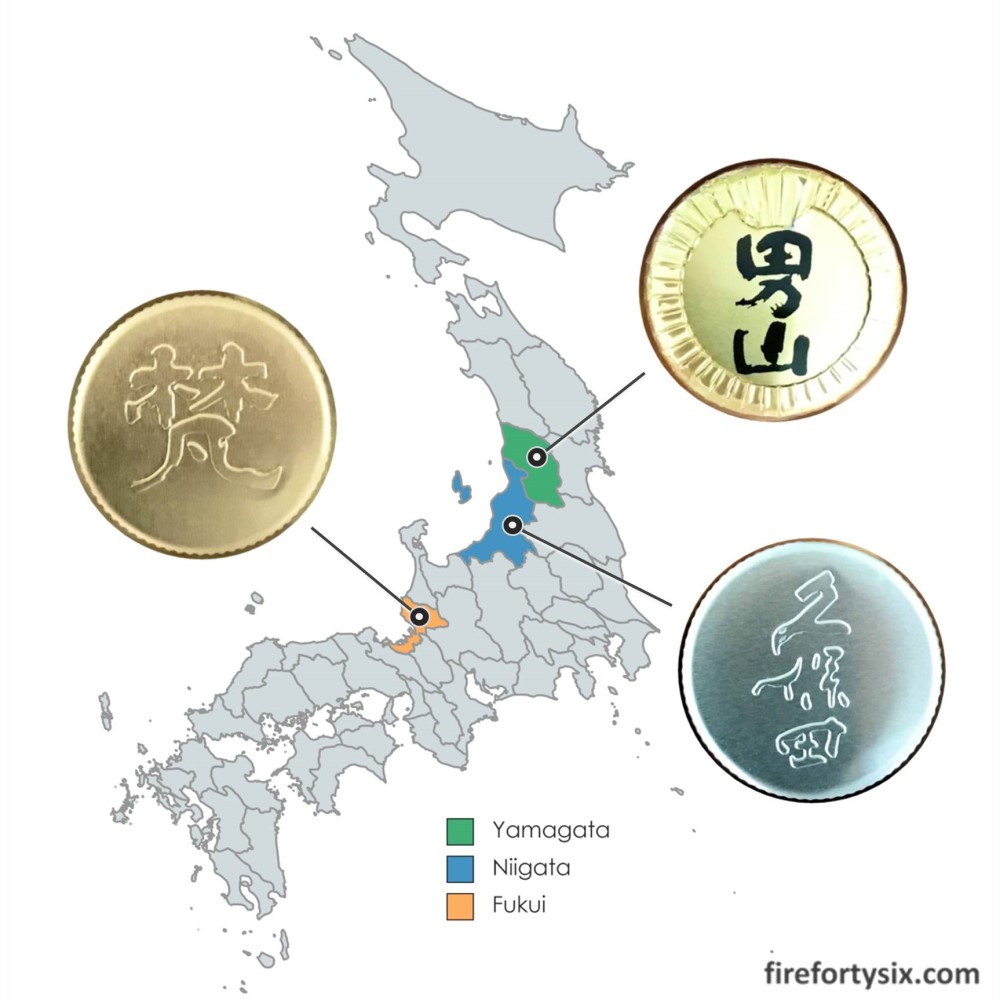
In a recent blog post featuring three different sakes, I created a graphic using The Wife’s photos of each brewer’s logo printed on the bottle caps. I cropped and overlaid each logo onto a map of Japan, and marked out their respective prefectures.
It was simple and effective, and I was quite happy with the result. But as time passed, a nagging thought surfaced in my mind and just wouldn’t go away — the logos were all round, so shouldn’t I circle crop them instead of keeping them as squares?
The itch grew day-by-day until it reached a point where I simply had to scratch it. And I embarked on a journey to figure out how to circle crop an image, with the self-imposed condition that any solution would have to be free.
Well, calling it a journey is an exaggeration of course, but it did take me some time to figure it out.
Apparently, Powerpoint allows you to easily crop an image to a shape but that functionality is only available from Powerpoint 2010 onwards, and my version is older than that (don’t ask me how old).
Computer says no.
Ok, time for Plan B.
After quite a bit of googling and some trial-and-error, computer said yes.
tldr; open image in Microsoft Paint 3D, draw a circle around the targeted object and use "Magic Select" functionality to remove background outside circle and make it transparent.For a more detailed explanation, with screenshots included, continue reading.
Open Image in Paint 3D
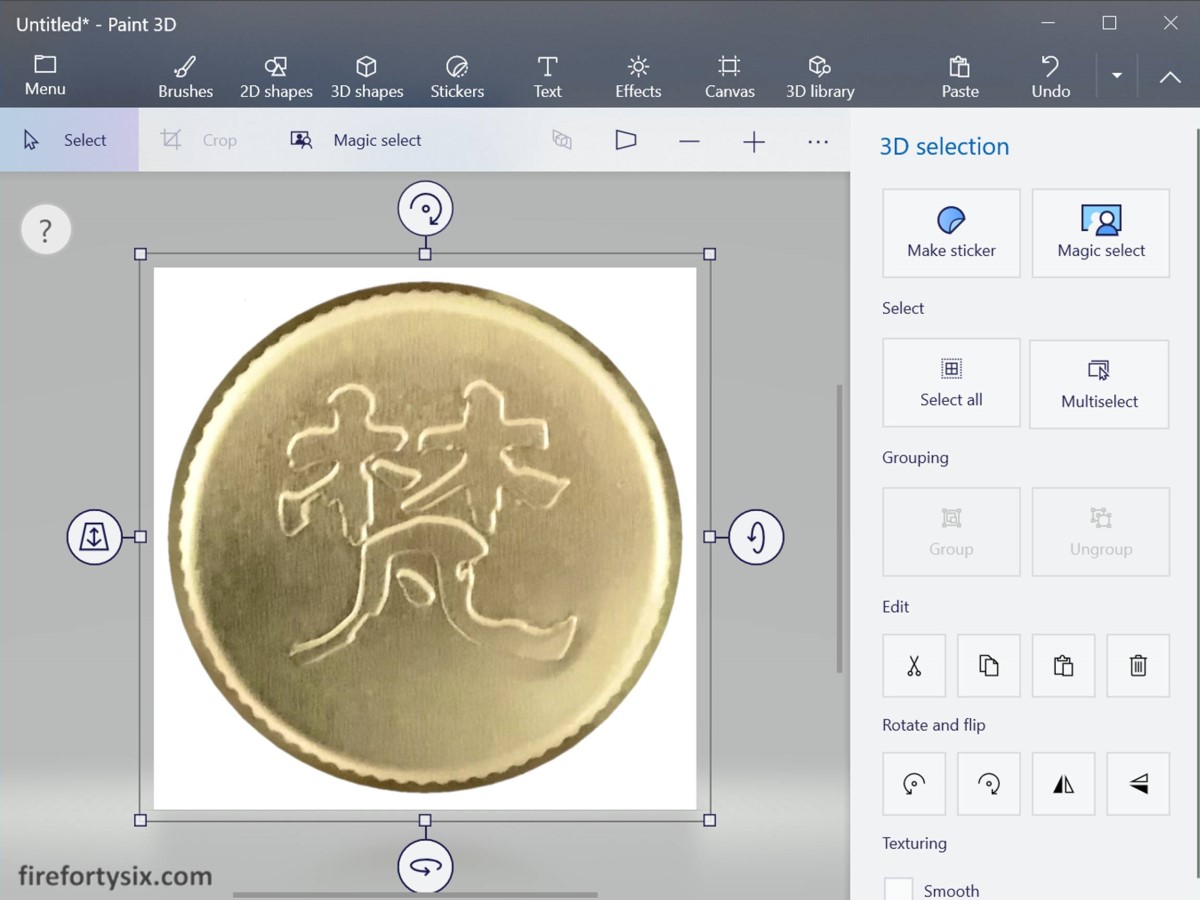
First things first, open the image file in Paint 3D. In this example, I used a photo of the Born logo printed on the bottle cap of the excellent Junmai Daiginjo Gold muroka sake.
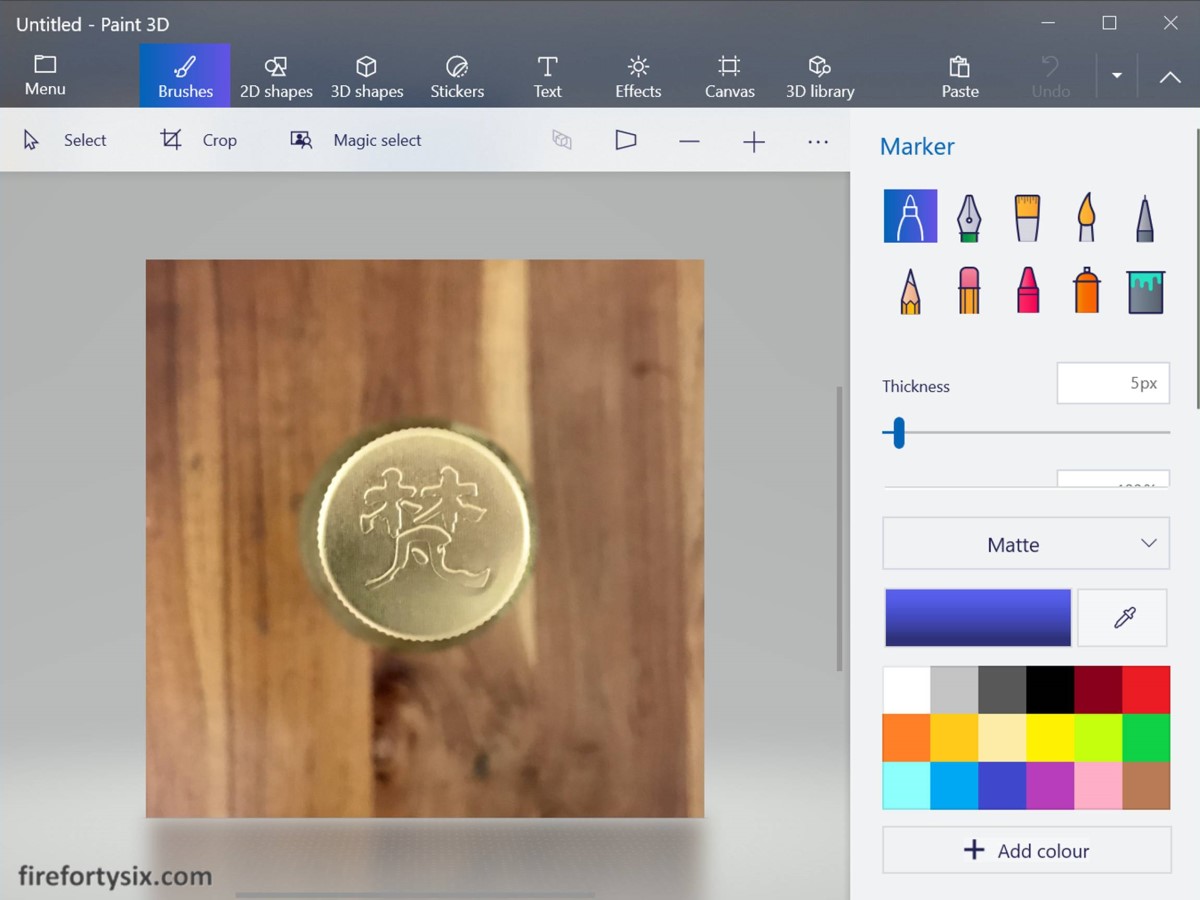
Draw Circle Around Targeted Object
Next, use the 2D shapes function to draw a circle around the target. Make sure that Fill is set to None and the Line type is Solid and has sufficient thickness (I used 50px).
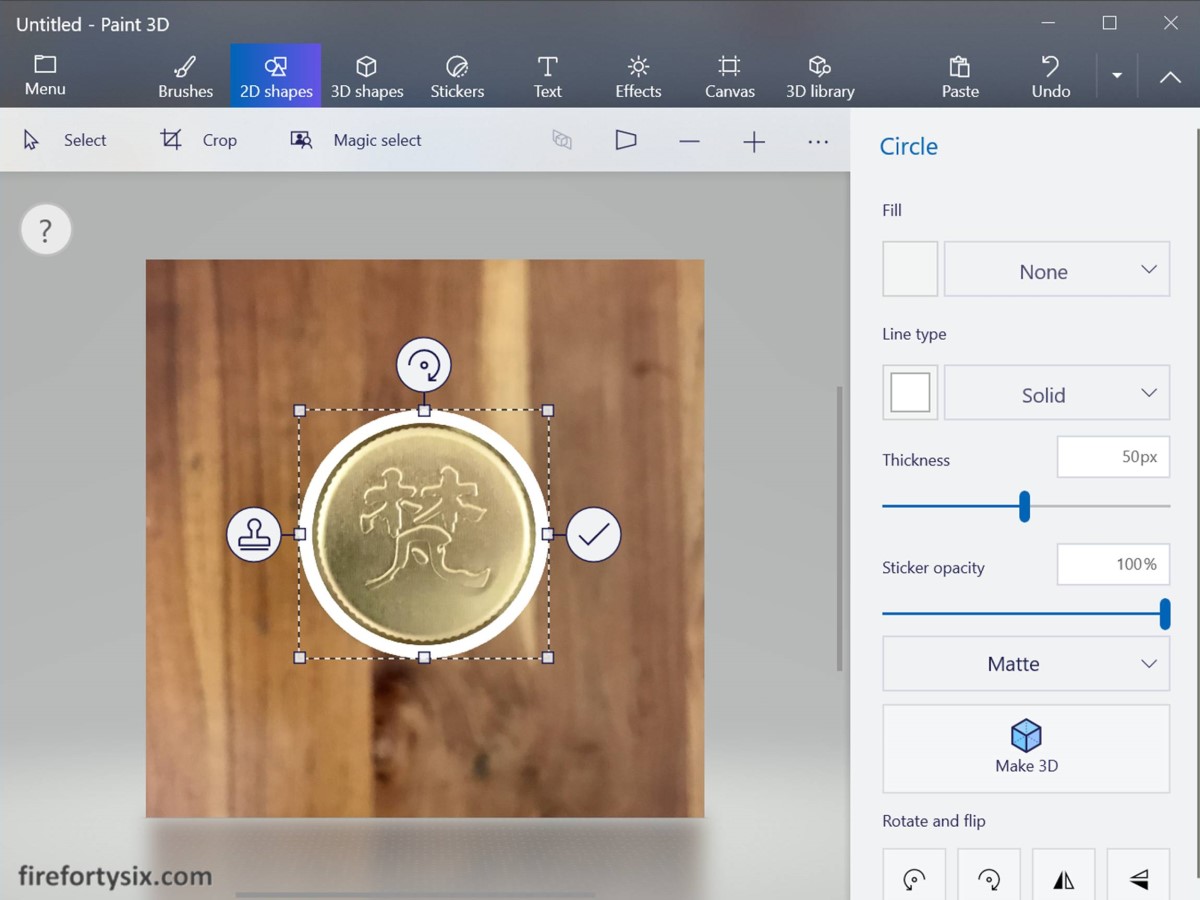
Make sure that the inner boundary of the circle covers the target fully.
You probably won’t get it exactly right on the first try, and it took me a while to adjust the circle for a proper fit, but it was relatively easy to do since the edges can be adjusted individually.
Remember to click on the tick mark on the right edge once you’re done.
Erase Everything Outside Circle
Once the circle is in place, everything outside of it has to be erased. To make this step easier, start by cropping the image using a 1:1 aspect ratio, up to the outer edge of the circle.
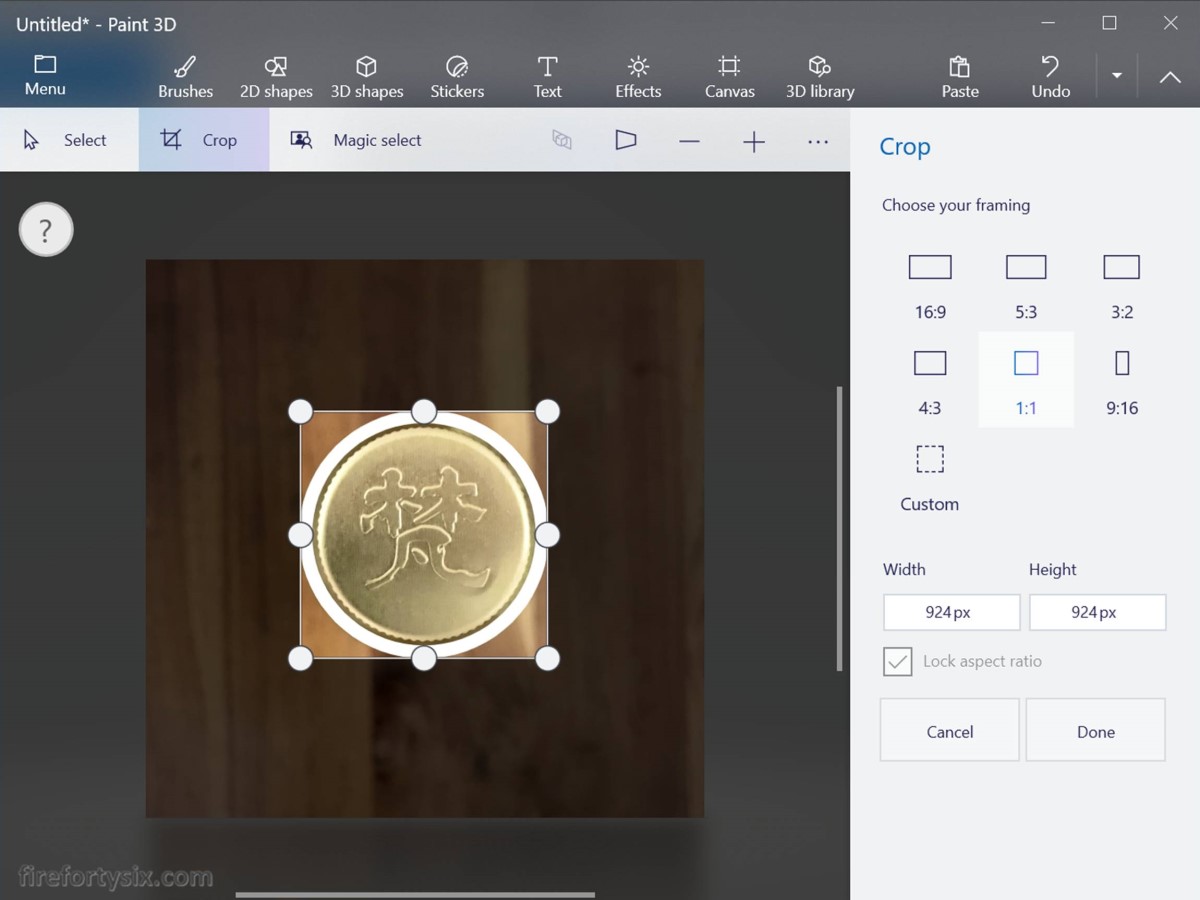
Then, use the Brushes function, choose the Eraser with sufficient thickness (I used 60px) and wipe out everything outside the circle.

Like Goldilocks and the Three Bears, you want an eraser size that’s just right — too thick and you might accidently erase the image itself; too thin and you’ll take a long time to finish erasing.
Use Magic Select to Remove Background
After clearing everything outside the circle, the only things remaining are the targeted object and a white background. To crop the image down to the object boundary, choose the Magic select function and click Next.
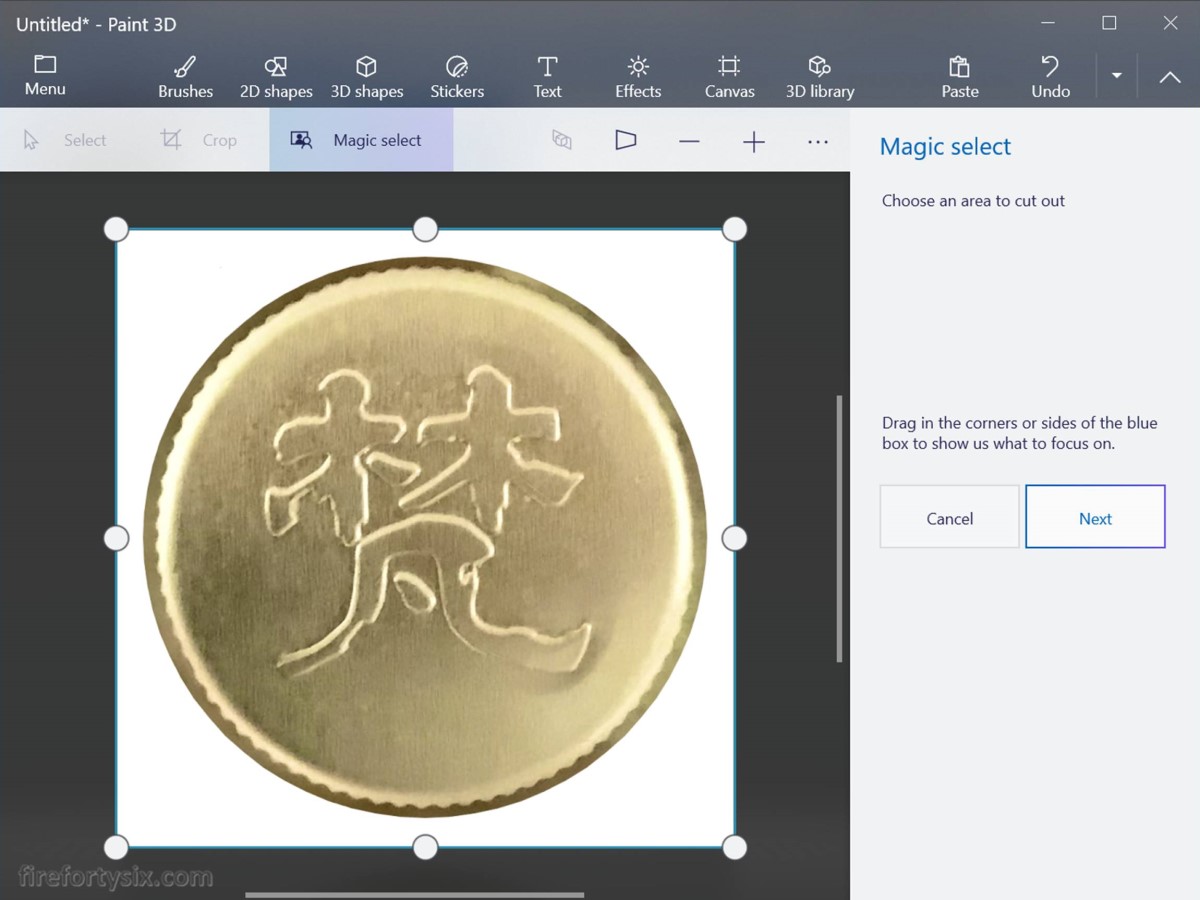
The software will automatically detect the edge of the object and crop away everything else. Or at least that’s what it’s supposed to do.
In reality, it’s not 100% accurate and in my case, it cut slightly into the object itself, as can be seen from the irregular shape of the green outline along the top and bottom edges.
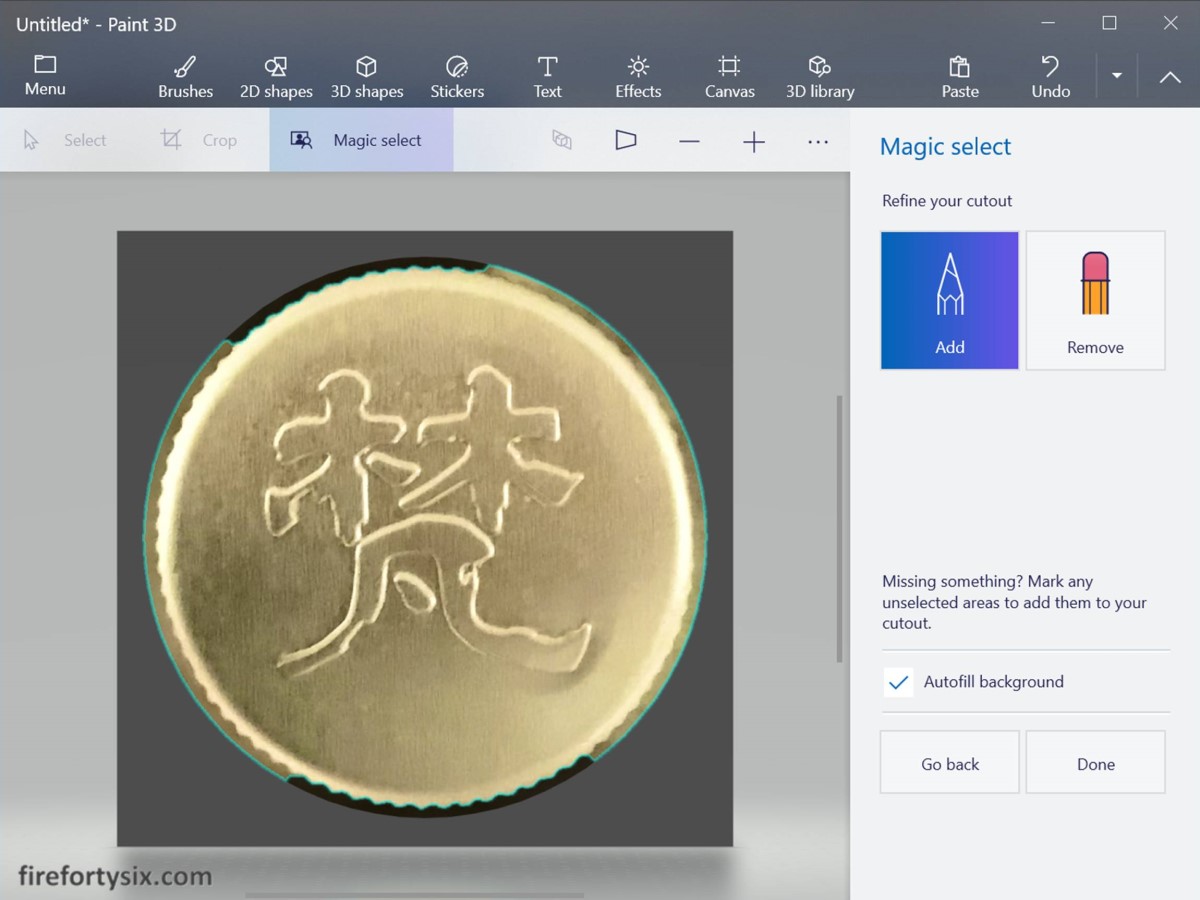
Thankfully, the developers anticipated this scenario and built in the ability to Add and Remove sections to refine the cutout. All you have to do is to manually mark out which areas need to be refined, and the software will adjust accordingly.
See my beautifully hand-drawn and perfectly smooth white line along the top edge, marking out the section that should be added back to the image…

… and the boundary is magically adjusted, living up to its name. I haven’t used this feature enough to say for sure if it will work all, or at least most, of the time. But based on my usage so far, it does seem a bit magical.
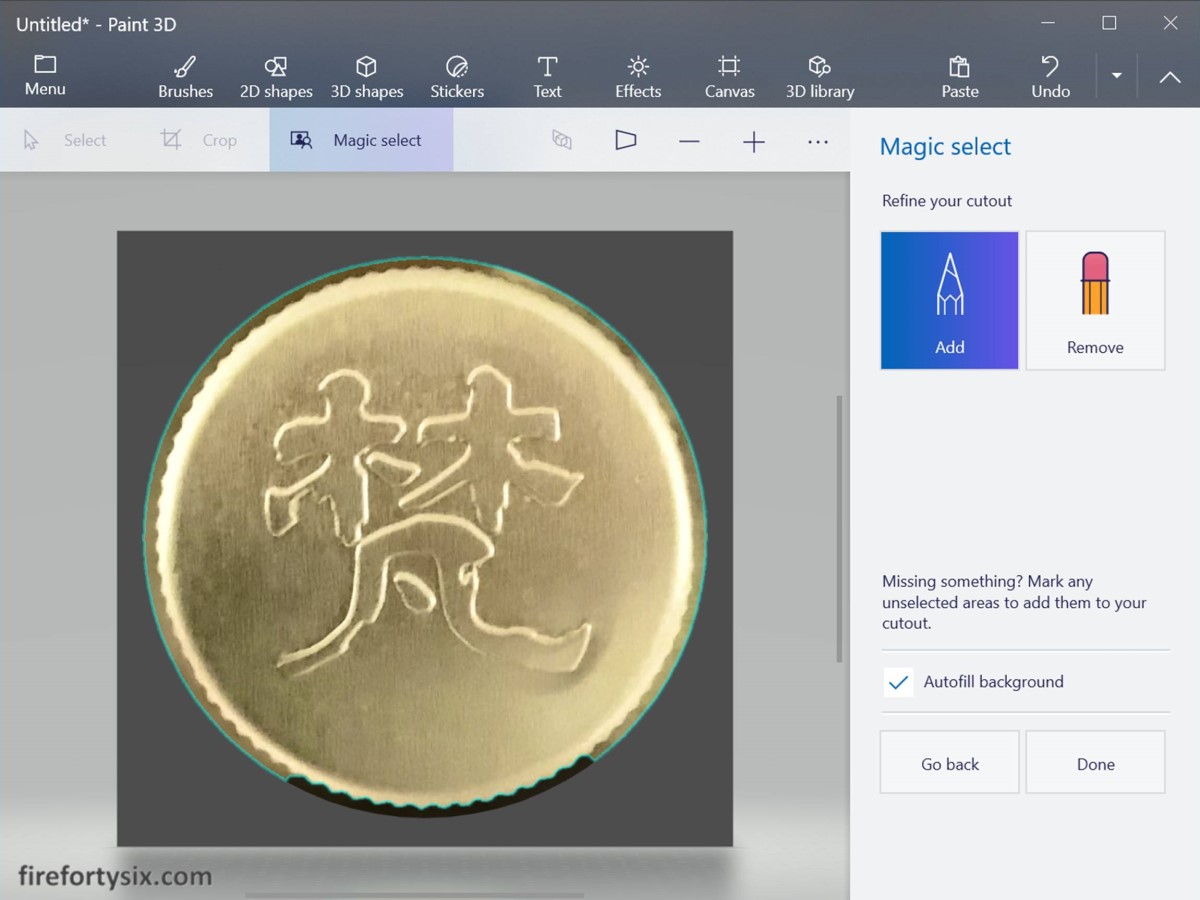
Once all the necessary manual adjustments are made, click Done and after a second or two, the circle-cropped image is generated.
It may look like the same image as before, but it has actually been separated into the round logo sitting on top of a white background.
Make Background Fully Transparent
Making the background transparent is supposed to be as simple as choosing the Canvas function and setting the Transparent canvas toggle switch to On.
Anything that’s truly transparent will have the same greyed out colour as the underlying canvas. But clearly there are still white and non-transparent remnants remaining.
In order to make the background completely transparent, click on the object itself to select it…
… move it to one side, outside of the marked-out square boundary…
… and erase all the white portions to make them fully transparent using the Brushes function and choosing the Eraser, like before.
There’s no need to worry about accidently erasing the image, so feel free to go full-on Papa Bear and use a super thick eraser. I used a fairly restrained 100px, but maxing it out to 200px would probably have been more satisfying.
Once everything is erased, click on the object again and move it back into the square boundary. This time, you can see that the background is fully transparent, without any trace of remnants.
(Optional) Make Final Size Adjustments
This step is optional, so feel free to skip it and proceed to the next one, but I like to use a standard 1000px by 1000px resolution for my square images, so I used the Canvas function to fix the size accordingly.
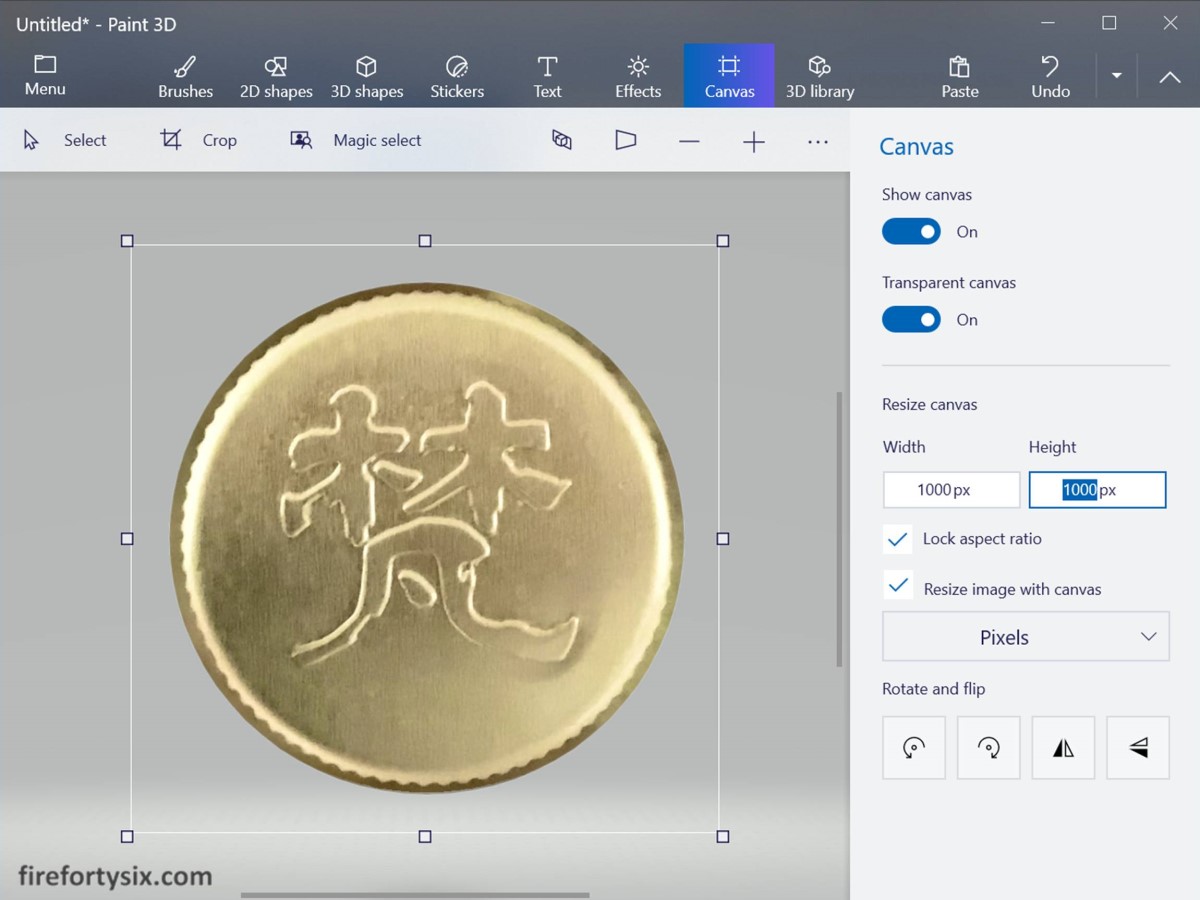
I also increased the size of the object itself, so that it’s closer to the edges, by clicking on it to select it, and then adjusting the size while simultaneously pressing on the Shift key.
This ensures that the aspect ratio is maintained while doing any size adjustment, and prevents any unwanted distortions.

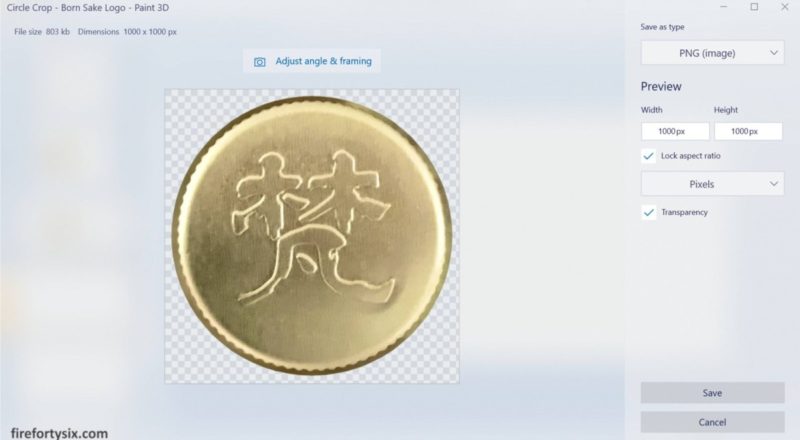
Save as PNG File
The final step is to save the image as a PNG file, so that transparency of the background is preserved.
Make sure that Save as type dropdown has PNG (image) selected, and the Transparency checkbox is ticked. The grey-and-white checkered background indicates that it’s transparent.
If you uncheck Transparency or choose JPEG (image), for example, the background turns white, indicating that it’s no longer transparent.
And you’re done.
After I finished circle-cropping the Born logo, I repeated the steps above for the Otokoyama and Kubota logo, and re-created my sake graphic. Here’s a side-by-side comparison.
It doesn’t seem like a huge improvement but it definitely looks cleaner. More importantly, it helped scratch my nagging itch.
I know it would have been much easier and quicker if I paid for an upgraded version of Microsoft Office (which by extension includes Powerpoint), but I’ve successfully held out for many many years now.
It’s inevitable that I’ll have to upgrade at some point in time, but I’m curious as to how long I can postpone it.
In the meantime, I guess I’ll just have to do some things the hard way. But that, in and of itself, can actually be quite entertaining.